

Увод у атрибуте ХТМЛ догађаја
У овом ћемо чланку детаљно разговарати о атрибутима ХТМЛ догађаја. Догађаји су радње које се изводе као резултат акције корисника. На пример, када корисник притисне тастер на тастатури за читање података, тада се каже да су то тастатурни догађаји. Ове активности се обављају када корисник погледа на веб локацију и изврши клик на дугме или када се страница учита притиском на дугме за освежавање где прегледач врши манипулације на страницама, за све ове акције се каже да су догађај. Овде ћемо проћи кроз основно разумевање догађаја и како то функционише у прегледачу на корисничким радњама. Постоји различита врста догађаја који се дешавају у читавим прозорима прегледача који су објасњени у наредним одељцима.
Топ 5 атрибута ХТМЛ догађаја

Постоји другачија варијанта догађаја доступних у ХТМЛ-у. И сви ти догађаји имају мали блок кода назван као руковалац догађаја који се активира када се изврши радња догађаја. Приложени су за ХТМЛ елементе. Руковаоци догађаја или слушаоци догађаја играју важну улогу у атрибутима ХТМЛ догађаја. Погледајмо различите врсте атрибута догађаја који су глобално декларисани и примењени на ХТМЛ елементе такође детаљно раде. Често се користе четири атрибута примарног догађаја. Су:
- Виндов Евент
- Форм догађаја
- Моусе Евентс
- Догађаји на тастатури
- Превуците и испустите догађаје
Описаћемо све ове атрибуте један по један са примером. Прво ћемо ићи са тим.
1. Прозор догађаја
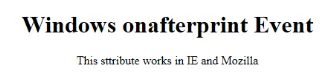
- онафтерпринтЕвент: Овај атрибут подржавају све Хтмл ознаке и функционише када је страница почела исписивати и има скрипту с једном вриједношћу. Ево примера ХТМЛ кода. Овај пример показује када се притисне дугме, она штампа поруку која се штампа у дијалошкој поруци.
Шифра:
Windows onafterprint Event

Windows onafterprint Event
This attribute works in IE and Mozilla

function myfun() (
alert("Document is being printed");
)
Windows onafterprint Event
Windows onafterprint Event
This attribute works in IE and Mozilla
function myfun() (
alert("Document is being printed");
)
Windows onafterprint Event
Windows onafterprint Event
This attribute works in IE and Mozilla
function myfun() (
alert("Document is being printed");
)
Windows onafterprint Event
Windows onafterprint Event
This attribute works in IE and Mozilla
function myfun() (
alert("Document is being printed");
)
Windows onafterprint Event
Windows onafterprint Event
This attribute works in IE and Mozilla
function myfun() (
alert("Document is being printed");
)
Windows onafterprint Event
Windows onafterprint Event
This attribute works in IE and Mozilla
function myfun() (
alert("Document is being printed");
)
Излаз:
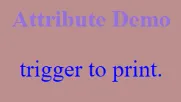
- онбефорепринт: Ради прије штампања. Догађај се отпушта након процеса штампања. Испод је код примера.
Шифра:
body (
color: #9370DB;
background-color: #BC8F8F;
text-align: center;
padding: 20px;
)
p (
font-size: 2rem;
)

Attribute Demo
body (
color: #9370DB;
background-color: #BC8F8F;
text-align: center;
padding: 20px;
)
p (
font-size: 2rem;
)
Attribute Demo
body (
color: #9370DB;
background-color: #BC8F8F;
text-align: center;
padding: 20px;
)
p (
font-size: 2rem;
)
Attribute Demo
body (
color: #9370DB;
background-color: #BC8F8F;
text-align: center;
padding: 20px;
)
p (
font-size: 2rem;
)
Attribute Demo
окидач за штампање.
функција гет () (
доцумент.боди.стиле.бацкгроунд = "# 00БФФФ";
)
Излаз:
- онеррор: Ова функција се активира када се грешка баци док нема елемента.
Шифра:

Здраво Свете.
функција миФун () (аларм ("проблем са учитавањем слике.");
)
Излаз:

- онлоад: Ова функција помаже при учитавању објекта и добро функционира да бисте видјели да ли је веб страница исправно учитана.
Шифра:
onload event demo
function ldImg() (
alert("image loaded without error");
)
Излаз:

- онресизе: Овај догађај се активира када се промијени величина прозора прегледача и било који елемент може покренути под атрибутом величине.
Шифра:
onresize event
function cmg() (
alert('welcome to educba');
)
window.onresize = cmg;
onclick="alert(window.onresize);">
Излаз:
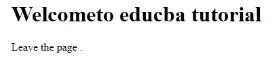
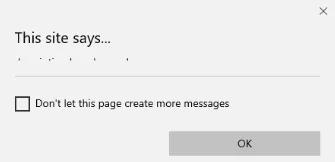
- онунлоад: Овај догађај се покреће када је прозор веб странице затворен или када корисник напусти веб страницу. Доље код истовара страницу када корисник оде и пошаље упозорење захваљујући претраживању. Овај догађај понекад функционише у свим прегледачима.
Шифра:
Welcometo educba tutorial
Welcometo educba tutorial
Welcometo educba tutorial
Напустите страницу.
функција онфунц () (упозорење ("Хвала вам што тражите!");
)
Излаз:

2. Формирајте догађаје
Ради са контролама форме. Следе атрибути који се јављају када корисник комуницира са прегледачима.
- онблур: Овај догађај се догађа када је пажња корисника удаљена од прозора форме. Следећи пример узима унос малих слова и када се кликне дугме за слање претвара се у горњи случај.
Шифра:
Form onblur
body (
text-align:center;
)
h1 (
color:pink;
)

EDUCBA
onblur="myfunc()">
Submit
function myfunc() (
var a = document.getElementById("aaa");
a.value = a.value.toUpperCase();
)
Form onblur
body (
text-align:center;
)
h1 (
color:pink;
)
EDUCBA
onblur="myfunc()">
Submit
function myfunc() (
var a = document.getElementById("aaa");
a.value = a.value.toUpperCase();
)
Form onblur
body (
text-align:center;
)
h1 (
color:pink;
)
EDUCBA
onblur="myfunc()">
Submit
function myfunc() (
var a = document.getElementById("aaa");
a.value = a.value.toUpperCase();
)
Form onblur
body (
text-align:center;
)
h1 (
color:pink;
)
EDUCBA
onblur="myfunc()">
Submit
function myfunc() (
var a = document.getElementById("aaa");
a.value = a.value.toUpperCase();
)
Излаз:

- онцханге: Овај догађај се дешава када корисник промени постојећи елемент у обрасцу. То се догађа када елемент изгуби фокус.
Шифра:
HTML onchange
select the dress color
pink
Yellow
White
Напомена: Изаберите било коју опцију
Опишите се укратко:прихвати
Излаз:
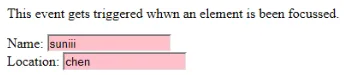
- онфоцус: Овај атрибут је омогућен када корисник посвети пажњу елементу на веб страници или када је фокусиран унос. Следећи пример истиче када унесемо унос у поље.
Шифра:
Овај догађај се покреће када се елемент фокусира.
Име:Локација:
функција онфоц (а) (
доцумент.гетЕлементБиИд (а) .стиле.бацкгроунд = "роза";
)
Излаз:
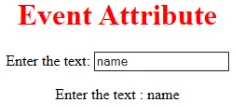
- онинпут: Овај догађај се покреће када се унесе унос у поље за унос. Активира се када се вредност у текстном пољу промени. Одразује се након што се вредност елемента промени.
HTML oninput

body (
text-align:center;
)
h1 (
color:red;
)

Event Attribute
Enter the text:

function myon()
(
var x = document.getElementById("EDUCBA").value;
document.getElementById("sid").innerHTML = "Enter the text : " +x;
)
HTML oninput
body (
text-align:center;
)
h1 (
color:red;
)
Event Attribute
Enter the text:
function myon()
(
var x = document.getElementById("EDUCBA").value;
document.getElementById("sid").innerHTML = "Enter the text : " +x;
)
HTML oninput
body (
text-align:center;
)
h1 (
color:red;
)
Event Attribute
Enter the text:
function myon()
(
var x = document.getElementById("EDUCBA").value;
document.getElementById("sid").innerHTML = "Enter the text : " +x;
)
HTML oninput
body (
text-align:center;
)
h1 (
color:red;
)
Event Attribute
Enter the text:
function myon()
(
var x = document.getElementById("EDUCBA").value;
document.getElementById("sid").innerHTML = "Enter the text : " +x;
)
Излаз:

- онинвалид: Овај атрибут позива догађаје када је текст унесен у врсту уноса неважећи или остаје празан. Овај атрибут догађаја мора попунити улазни елемент.
Шифра:
example oninvalid Event
p (
color:orange;
)
body (
text-align:center;
)
ХТМЛ се користи за креирање веб странице
Унесите име:Излаз:

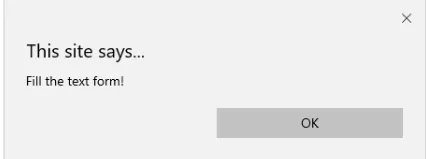
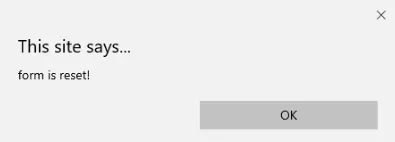
- онресет: Покреће се када се форма одмара. Следећи пример каже да када пошаљете дугме образац се обрађује и поново када кликнете да бисте ресетовали образац се ресетује.
Шифра:
body (font-family:calibri;)
label (font-variant:small-caps;)
ol (background-color:#610000; margin-top:35px;)
li (margin-top:3px; padding:3px; background-color:rose; font-size:15px;)
div (position:absolute;top:250px;left:70px; font-size:1.5em;
)
Form with input to reset and submit
Enter input:
function onInva() (
alert("Input field cannot be empty!");
)
function onInp() (
var input_value = document.getElementById("iv").value;
document.getElementById("a_box").innerHTML = "Input value:
" + iv;
)
function onRes() (
alert("form is reset!");
)
function onSubmitEvent() (
alert("Form is loading");
location.reload();
)
Излаз:
- онсеарцх: Ради када корисник притисне тастер за унос.
Шифра:
Пишите на пољу.
функција миФ () (
вар к = доцумент.гетЕлементБиИд ("вредност1");
доцумент.гетЕлементБиИд („узорак“). иннерХТМЛ = „елемент претраге је:„ + к.валуе;
)
Излаз:

- онселецт: активира се када је у пољу за унос изабран текст. У њега се убацује дијалошки оквир који штампа поруку упозорења.
Шифра:
onselect demo
h1 (
color:magenta;
)
body (
text-align:center;
)

function eduhtml() (
alert("text highlighted!");
)

EDUCBA Online tutorial
Text Box:
onselect demo
h1 (
color:magenta;
)
body (
text-align:center;
)
function eduhtml() (
alert("text highlighted!");
)
EDUCBA Online tutorial
Text Box:
onselect demo
h1 (
color:magenta;
)
body (
text-align:center;
)
function eduhtml() (
alert("text highlighted!");
)
EDUCBA Online tutorial
Text Box:
onselect demo
h1 (
color:magenta;
)
body (
text-align:center;
)
function eduhtml() (
alert("text highlighted!");
)
EDUCBA Online tutorial
Text Box:
Излаз:

- онсубмит: Сврха овог догађаја је извршити акцију извршену док притиснете дугме субмит.
Шифра:
Onsubmit Example
Enter name:
Email :
function myF() (
alert("The form was submitted");
)
Излаз:
3. Атрибути кључних плоча
- ОнКеиДовн: Покреће се када корисник притисне типку са стрелицом надоле.
Шифра:
Пример за Онкеидовн.
функција микедвн () (
упозорење („притискање тастера је активирано“);
)
Излаз:
- ОнКеиПресс: Овај догађај се покреће када корисник притисне било који тастер на тастатури. Напомена: неки претраживач не подржава притискање ниједне типке.
Шифра:
Овај пример показује када корисник у текстном подручју покрене догађај
>Излаз:

- ОнКеиУп: Овај се атрибут активира када корисник пусти курсор из текстуалног поља. Испод следи демонстрација.
Шифра:
Овај пример трансформише лик у малим словима.
Унесите име:функција микеи () (
вар г = доцумент.гетЕлементБиИд ("јјј");
г.валуе = г.валуе.тоЛоверЦасе ();
)
Излаз:

4. Атрибути догађаја миша
Ова акција покреће догађај миша када се миш притисне или са рачунара или било ког спољног уређаја попут паметног телефона или таблета. Неки од догађаја са мишем су дати у наставку:
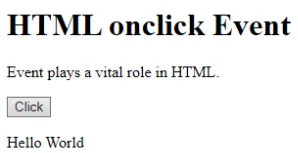
- онцлицк: Покреће се када корисник притисне тастер преко миша. У наставку је дат пример уноса за приказ догађаја док се кликне мишем.
Шифра:
HTML onclick Event
HTML onclick Event
HTML onclick Event
Догађај игра виталну улогу у ХТМЛ-у.
Кликните нафунцтион онцф () (
доцумент.гетЕлементБиИд ("узорак"). иннерХТМЛ = "Здраво свет";
)
Излаз:
- онмоусемове: активира се када миш пређете преко слике у било ком правцу.
Шифра:
Event onmousemove demo
Овај догађај се активира када показивач повуче свој смер.
Пример текстаИзлаз:
- Онмоусеуп: Овај догађај даје обавештење када корисник отпусти дугме на излазу.
Шифра:
body (
color: "#ff0000";
height: 120vh;
background-color: #610000;
text-align: center;
)
.polygon (
float: right;
shape-inside: polygon(0 0, 0 200px, 100px 200px);
clip-path: polygon(0 0, 0 250px, 100px 300px);
height: 200px;
width: 200px;
background: linear-gradient(to bottom left, #7CFC00, #8B008B);
)
p (
margin: 30px auto;
)

HTML onmouseup Demo
body (
color: "#ff0000";
height: 120vh;
background-color: #610000;
text-align: center;
)
.polygon (
float: right;
shape-inside: polygon(0 0, 0 200px, 100px 200px);
clip-path: polygon(0 0, 0 250px, 100px 300px);
height: 200px;
width: 200px;
background: linear-gradient(to bottom left, #7CFC00, #8B008B);
)
p (
margin: 30px auto;
)
HTML onmouseup Demo
кликните испод објекта
функција мупФн () (доцумент.куериСелецтор ('. полигон'). стиле.трансформ = 'скала (2.2)';
)
Излаз:

- Онмоусеовер: извршите ЈаваСцрипт када померате показивач миша преко слике
Шифра:
Example demonstrating Onmouseover.
Mouse over
function A() (
document.getElementById("sample").style.color = "yellow";)
function B() (
document.getElementById("sample").style.color = "green";
)
Example demonstrating Onmouseover.
Mouse over
function A() (
document.getElementById("sample").style.color = "yellow";)
function B() (
document.getElementById("sample").style.color = "green";
)
Example demonstrating Onmouseover.
Mouse over
function A() (
document.getElementById("sample").style.color = "yellow";)
function B() (
document.getElementById("sample").style.color = "green";
)
Example demonstrating Onmouseover.
Mouse over
function A() (
document.getElementById("sample").style.color = "yellow";)
function B() (
document.getElementById("sample").style.color = "green";
)
Излаз:
5. Превуците атрибуте догађаја
Ова апликација помаже у ХТМЛ прозору када корисник превуче улазни елемент. Испод су различити слушаоци догађаја који се у ХТМЛ-у користе за чување повучених података.
- Ондраг: користи се када се елемент повлачи са веб странице.
- Ондрагстарт : Ово се активира када корисник почне да се повлачи из поља за унос. Следећи пример демонстрира повлачење подручја са два циља.
Шифра:
#b1, #b2 (
float:left;padding:11px;margin:11px; -moz-user-select:none;
)
#b1 ( background-color: #FF6699; width:65px; height:85px; )
#b2 ( background-color: #808000; width:180px; height:180px; )

function dStart(e) (
e.dataTransfer.effectAllowed = 'move';
e.dataTransfer.setData("Text", e.target.getAttribute('id'));
e.dataTransfer.setDragImage(e.target, 0, 0);
return true;
)


Drag demo
Drag the box.
ondragstart = "return dStart(e)">
Drag it
welcome
#b1, #b2 (
float:left;padding:11px;margin:11px; -moz-user-select:none;
)
#b1 ( background-color: #FF6699; width:65px; height:85px; )
#b2 ( background-color: #808000; width:180px; height:180px; )
function dStart(e) (
e.dataTransfer.effectAllowed = 'move';
e.dataTransfer.setData("Text", e.target.getAttribute('id'));
e.dataTransfer.setDragImage(e.target, 0, 0);
return true;
)
Drag demo
Drag the box.
ondragstart = "return dStart(e)">
Drag it
welcome
Излаз:

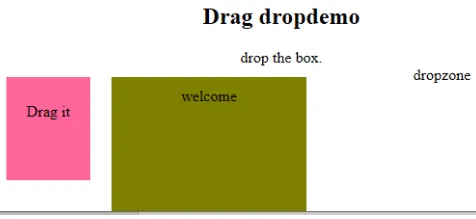
- ондроп: Извршите овај атрибут када се елемент који се повлачи испушта.
Шифра:
#b1, #b2 (
float:left;padding:11px;margin:11px; -moz-user-select:none;
)
#b1 ( background-color: #FF6699; width:65px; height:85px; )
#b2 ( background-color: #808000; width:180px; height:180px; )

function dStart(e) (
e.dataTransfer.effectAllowed = 'move';
e.dataTransfer.setData("Text", e.target.getAttribute('id'));
e.dataTransfer.setDragImage(e.target, 0, 0);
return true;
)


Drag dropdemo
drop the box.
ondragstart = "return dStart(e)">
Drag it
ondrop="drop(event)"
ondragover="allowDrop(event)">
welcome
dropzone
Излаз:
Закључак
Овај атрибут догађаја помаже да се веб апликација учини веома лакшом и атрактивнијом. Различита појава радњи генерише различите догађаје. Иако се овај приступ углавном избегава, али програмер воли да учи функцију додељену догађајима ХТМЛ атрибута, а ови руковаоци догађајима се и даље извршавају како би улепшали веб странице.
Препоручени чланак
Ово је водич за атрибуте ХТМЛ догађаја. Овде смо расправљали о Уводу у атрибуте ХТМЛ догађаја, заједно са имплементацијом и исходом кода. такође можете да прођете кроз наше предложене чланке да бисте сазнали више -
- Кратки увод у ХТМЛ оквире
- Измена атрибута ХТМЛ стила
- Примене ХТМЛ-а | Топ 10 употреба
- 10 најбољих разлика ХТМЛ у односу на ХТМЛ5 (Инфограпхицс)
- Тхров вс Тхров | Топ 5 разлика које би требало да знате
- Поставите боју позадине у ХТМЛ-у са примјером